06 Aug 30-Day Plank Challenge, or: How to strengthen your Core properly
It seems that everything in life is a challenge nowadays. To keep up with Facebook, emails, groceries, eating healthy, getting enough exercise, taking time to meditate; it all requires effort and planning. Then still, it seems that there are not enough hours in the day. Did I even mention going to work? Or am I just expressing my own experience here? If that isn’t enough to juggle, there are all kinds of challenges to join. Yes, you can voluntarily sign up to be challenged to meditate every day for 21 days in a row, or to become enlightened by eating healthy for 40 days, and… Need I go on?
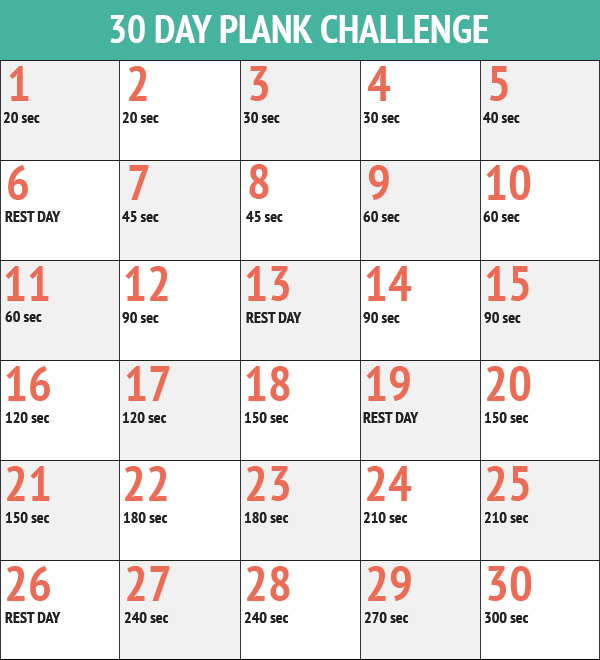
And so there is the 30-Day Plank Challenge. I am actually on Day 4 of this core-strengthening program. Does it sound like I am ‘against’ challenges? Well, yes and no. I do think that most people have more than enough to do already. Adding another ‘should’ may not help if you are also trying to find some peace of mind at the same time. On the other hand, to have an incentive – or a gentle encouragement, if you will – to do something that otherwise you won’t (see also my blog about Procrastination), may be helpful. At least it is for me. Especially when it comes to working on my abs.
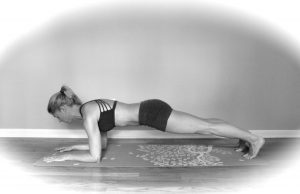
The 30-Day Plank challenge gives you an exercise routine of practicing Forearm Plank every day for a month. You start with sustaining the pose for 20 seconds, and on day 30 you will be able to hold it for 5 minutes. Am I really interested in sustaining a Forearm Plank for 5 minutes? I am not. Yet, I know that it is good for my overall posture, and for the health of my low back, to have a strong core. Moreover, a strong core will enhance all my other postures in my yoga practice. And to be honest, I am also curious if I will actually be able to do this plank posture for 5 minutes. I invite you to join me!
When practiced properly, Forearm Plank will strengthen the Transverse Abdominus. The Transverse Abdominus (“TA”) forms part of the middle layer of core muscles, and supports the spine. The TA is the prime member of this group of muscles that wrap around the torso – from the back near the lumbar spine to the front – covering the abdomen from sternum to pubic bone. Think about them as a muscular corset and you get the picture. If not practiced correctly, you may not get all the benefits of Forearm Plank though, and there is even a potential of hurting your low back. Moreover, I suggest adding (at least) two more postures to your daily routine, in order to keep the body balanced. Hereunder, I will share a proper way to practice your plank.
How to practice Forearm Plank:
- Lie on your belly, with your elbows under your shoulders and forearms straight out in front. Make sure your elbows are straight under your shoulders when you look from the side, as well as from the front, in order to keep the shoulder joints safe.
- Curl your toes under, and press your heels back while you lift your hips to shoulder height. Keep pressing the heels back to engage your legs. The firmer your legs, the lighter it will get in your upper body.
- Lengthen your chest forward, and make sure your neck is in line with your spine, looking down to the floor, in order to keep length in your upper spine and to not create tension in your neck.
- Imagine a horizontal line between your hipbones, and lift that ‘line’ up to the ceiling, to engage your lower abdomen. Draw your navel back to your spine, and up towards your chest.
- Energetically draw your elbows back, roll your outer shoulders away from your chest and widen your collar bones.
- Extend your sacrum to your heels.
- Breathe in and out through your nose, for however many seconds you are at.
Be mindful not to arch your low back, which will compress the vertebrae in your low back and will not engage the TA. Also make sure that your shoulders stay wide and away from your ears. I suggest using a stopwatch, rather than trying to count the seconds.
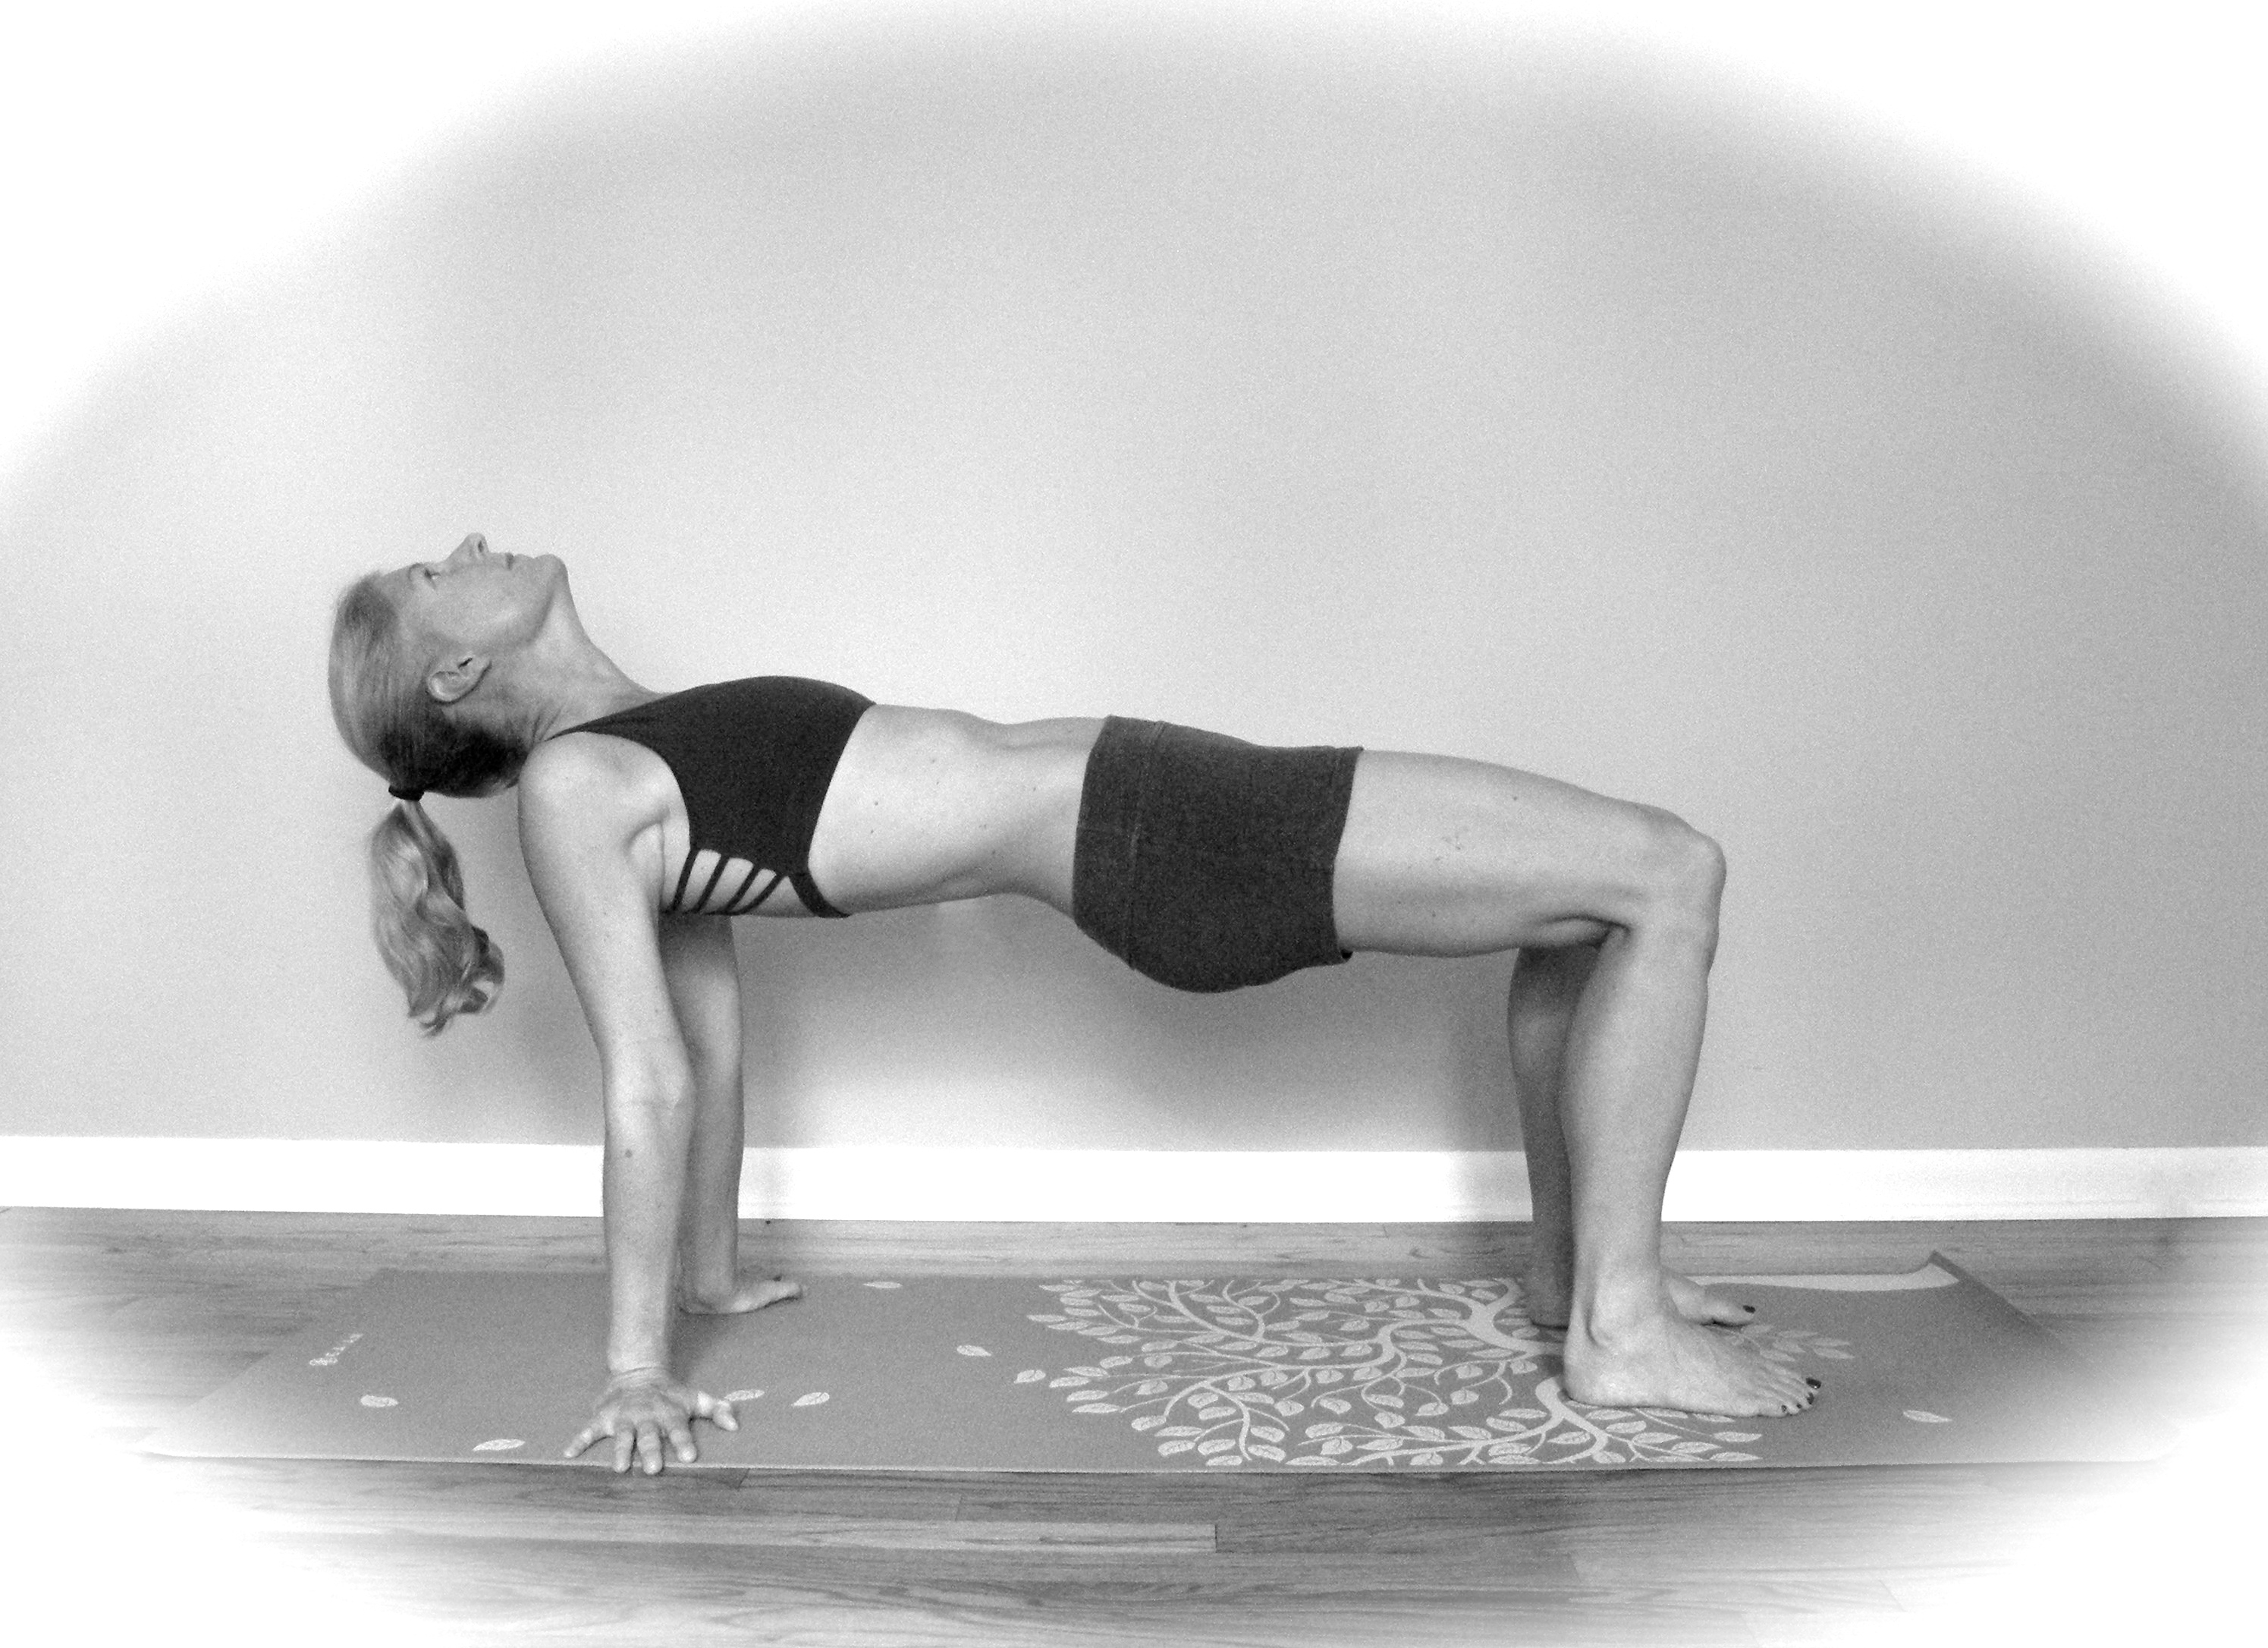
Counter pose: Upward Plank Variation
This variation of Upward Plank Pose will stretch your chest and release tension around the shoulders, while it strengthens the Rectus Abdominus. The Rectus Abdominus forms the outer layer of your core, and gives a ‘six-pack’ look when well trained. This muscle provides support for the abdominal organs, and allows you to bend forward.
- Sit with your knees bent, feet on the floor and in line with your sitz bones, and hands shoulder-width apart behind your hips with fingers turned to the side.
- On an exhalation, lift your hips up to the height of your knees, while you draw your outer shoulders back, and widen your chest. Knees are straight over the ankles.
- Draw the ‘line’ between your hipbones back to your spine. Draw your navel back to your spine, and up towards your chest.
- Press your sacrum to your knees, while you energetically draw your heels towards your hands.
- You can keep looking towards your knees, or draw your head back until the neck is in line with your spine. If you do draw your head back, draw your ears back first, to keep an elongation in your neck.
- Sustain for 5 breaths, while focusing on rolling your shoulders away from each other, and lifting the hips.
- Repeat one more time.
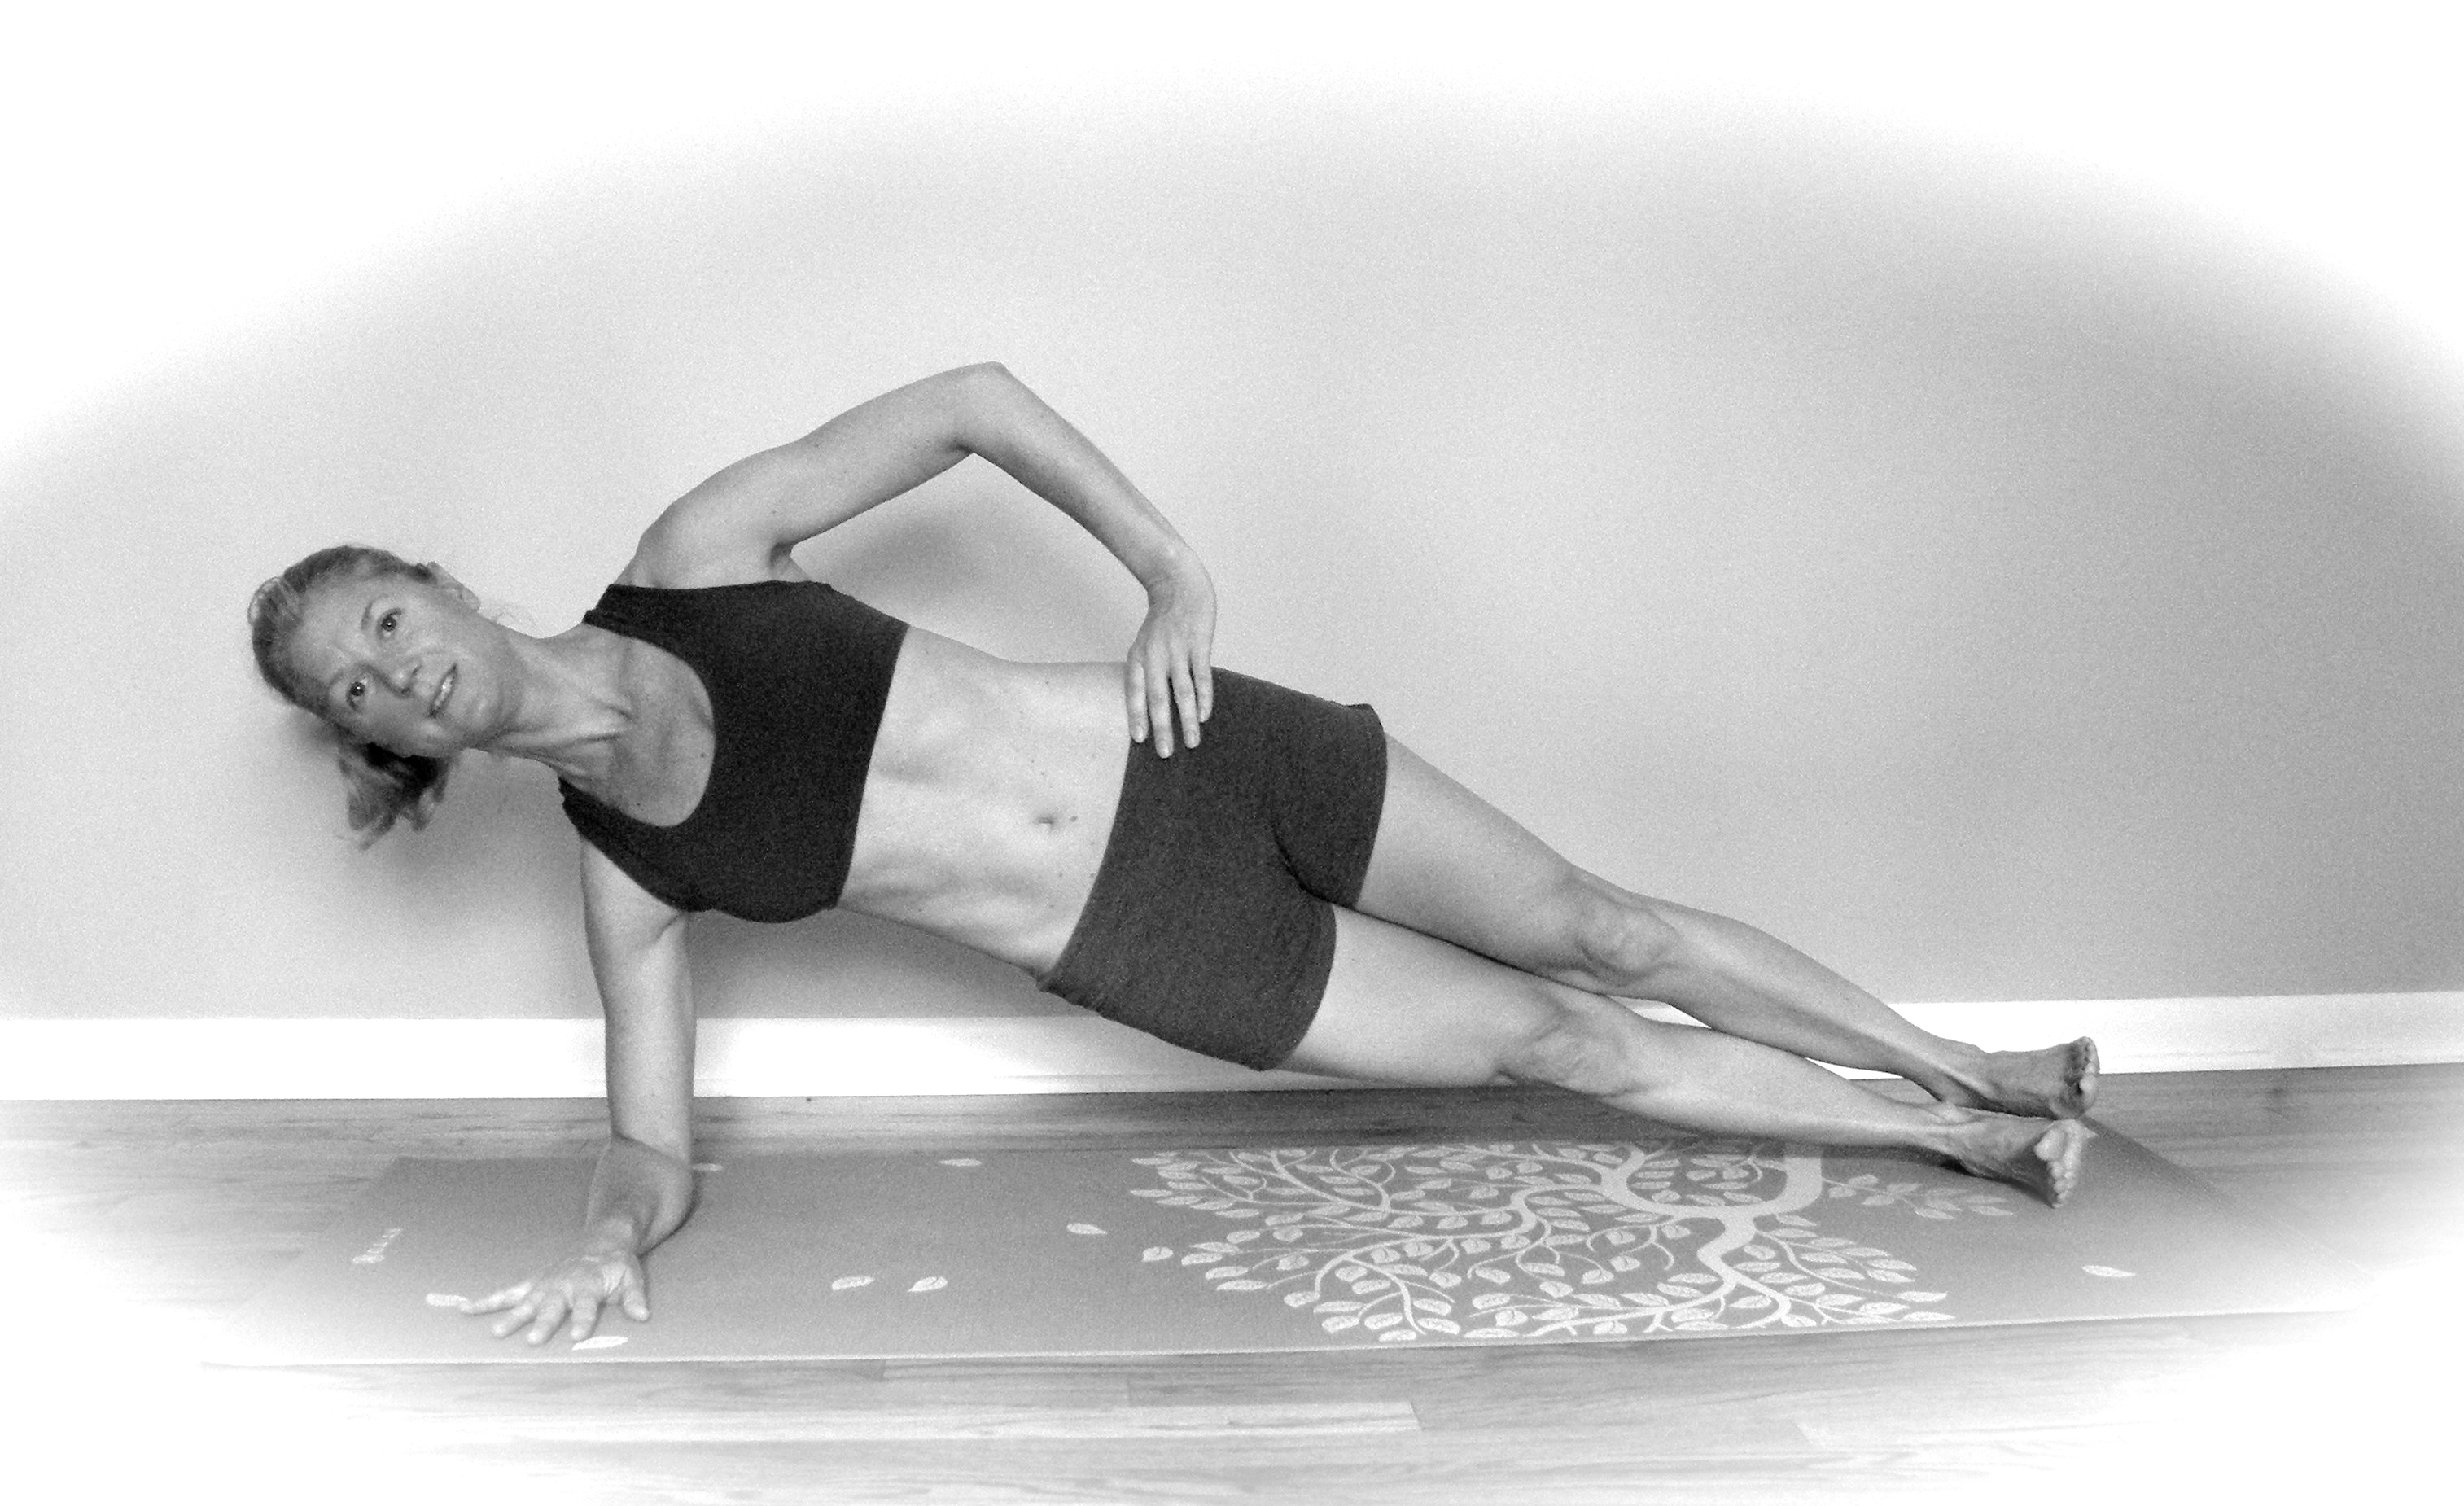
For a balanced core workout: Side Plank Variation
To maximize your core strengthening routine, you may want to add a pose that strengthens the Obliques. The Internal and External Obliques form the outer layer of your core muscles, and allow your torso to twist. They start at the ribs and sternum on the side and front body, and wrap around the front torso to the pelvis. The Obliques ensure that the spine twists evenly and that the intervertebral disks don’t get injured while doing such.
- Lie on your side, with your elbow straight under your shoulder and your legs in line with your spine. Feet are flexed and on top of each other.
- As you exhale, press into your forearm and lift your hips off the floor, creating a straight line from your heels to your head. Make sure your elbow is still straight under your shoulder.
- Your shoulders are stacked on top of each other. Draw your top shoulder back, and the shoulder blade towards the midline of your body. Keep a mental image of being stacked against the wall with both shoulders, both hips and your feet touching the wall.
- Lengthen your sacrum to your heels. Draw the ‘line’ between your hipbones back to your spine. Draw your navel back to your spine, and up towards your chest.
- Sustain for 5 breaths.
- Repeat on other side.
If your body is not ready for the full version of this Side Plank variation, you can practice with this modification: bend the knee of the top leg and place it front of you – between hip and knee – with your foot flat on the floor, and then proceed as described above.
If you have any questions, I would be happy to answer them. Let me know how you are progressing!
Happy planking!
Ps. This blog post doesn’t intend to give a full overview of all the core muscles. Obviously, a very important muscle – the Psoas – is left unspoken here.
30-Day Plank Challenge chart:
